Photoshop Skills Used:
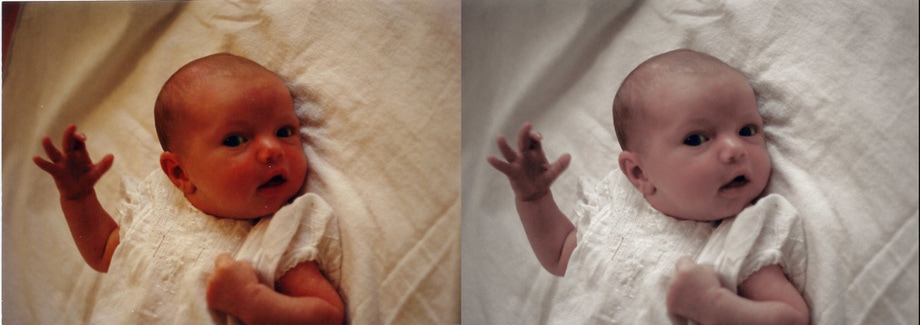
The first thing I corrected in photo was in Photoshop. There were several white specks and stains on the photo which I removed with the clone stamp. Next I opened the photo in Camera Raw and cropped the photo to remove the white edges from the scanner. I first desaturated the image. I then increased the black level in order to lighten the image more, and to move away from the shadow clipping warning. I also decreased the clarity setting to negative 2 in order to lessen the harsh lines around the baby’s face. I then went to the HSL/Grayscale adjustments and increased the reds, oranges, and yellows to make the skin look slighlty more skin toned. In the tone curve I increased the highlight settings and decreased the lights in the dress in order to capture some of the intricate stitch work in the dress.
- Clone Stamp
- Crop
- Saturation
- Tone Curve
- HSL/Grayscale
- Highlights
- Clarity
The first thing I corrected in photo was in Photoshop. There were several white specks and stains on the photo which I removed with the clone stamp. Next I opened the photo in Camera Raw and cropped the photo to remove the white edges from the scanner. I first desaturated the image. I then increased the black level in order to lighten the image more, and to move away from the shadow clipping warning. I also decreased the clarity setting to negative 2 in order to lessen the harsh lines around the baby’s face. I then went to the HSL/Grayscale adjustments and increased the reds, oranges, and yellows to make the skin look slighlty more skin toned. In the tone curve I increased the highlight settings and decreased the lights in the dress in order to capture some of the intricate stitch work in the dress.
