Photoshop Skills Used:
- Select Tool (Lasso)
- Clone Stamp Tool
- Patch Tool
- Gaussian Blur
- Layer Blending Modes
- Layer Opacity Changes
- Text Tool
- Hue/Saturation Adjustment
- Channel Mixer
- Levels
- Frequency Separator
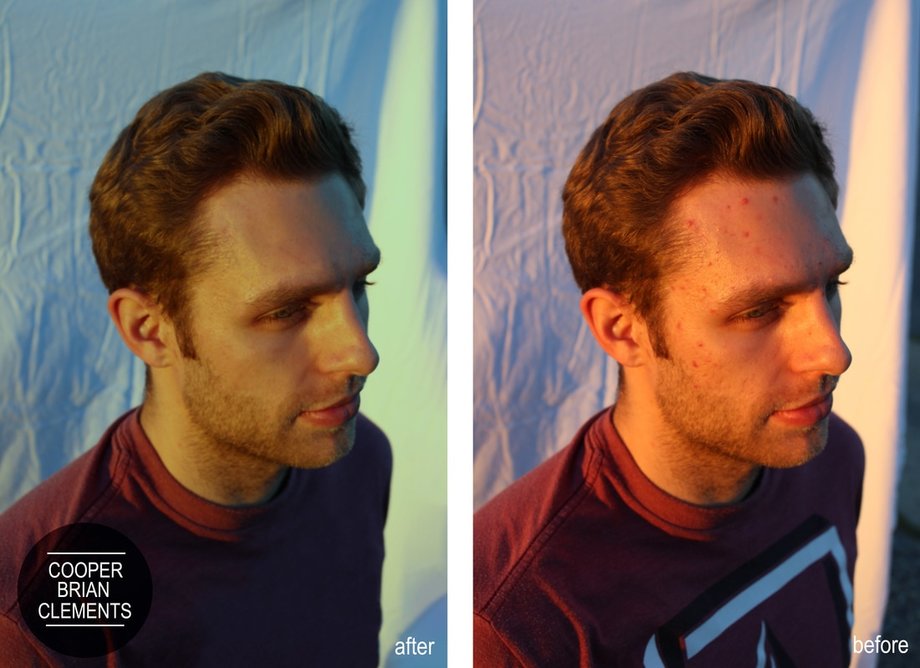
For this project, I used a reference photograph I took of one of my childhood friends. He's always had some pretty patch skin and I thought it would be great to use the frequency separator to clear up his complexion. I first removed his larger blemishes with the clone stamp tool. Then I created two copies of the background layer and used Gaussian Blur to blur the skin on the first layer. Then I brought out the texture in the second layer using Apply Image, and layer blending modes. I then proceeded to grab little sections of skin and increasing or decreasing the blending mode so that his skin became more clear. I then adjusted the color of the image using the hue/saturation and channel mixer adjustments so that the image became softer while still keeping its strong blue and red color scheme.
Font:
Arial Narrow
